
An independent guide
Order of the Sinking Star Dragon Puzzle Help
For the three-part Heroes and Mirrors dragon stage in Order of the Sinking Star, use the mirrors to move and reorient each dragon so its fire removes the blocking goblin. In the final room, pair the mirrors to return the breath across the row below the dragon, push the goblin into that row, then shift its mirror left and up to make the dragon hit itself. If your room instead has a goblin on a lower-left yellow button and two heroes, use the separate historical-board solution below: that goblin must survive, and the block must return to the fire line immediately after the other goblin is killed.
- Main arrangement
- The three-room stamp stage called Heroes and Mirrors Part 5 by Adam Beck's October 8, 2026 guide. This numbering is the author's grouping, not a universal in-game room ID.
- Version
- Main route: full-game launch-period original instructions and pictures; exact patch and capture platform unspecified. The yellow-button board is a separate June-era community report.
- Goal
- Clear the blocking creatures and reach the blue exit in the three-part stage, or keep the yellow gate open and reach the two exits in the historical board. No boss encounter is described.
Identify the arrangement before choosing a solution
These are different boards. Match characters, objects and goals together; the presence of a dragon alone does not identify a room.
Scroll across to read every column.
| What you see | Applicable route | What must happen |
|---|---|---|
| Warrior in a waterside town; movable mirrors; a dragon and a goblin on a small isolated island | Mirror-dragon Part 1 | Reflect the south-facing dragon into water so its last breath hits the island goblin |
| Warrior, two mirrors on the right and a goblin across the water to the left | Mirror-dragon Part 2 | Leave space beside the mirror, then send the dragon left into the water |
| Dragon behind bars at upper left; a goblin below it; two mirrors toward the upper right; pink barrier guarding a blue exit at left | Mirror-dragon Part 3 | Use reflected fire to remove the goblin, then the dragon |
| Red Warrior and green Thief; a blocking stone or crystal; a lower-left goblin on a yellow button; blue gate and two upper-right exits | Historical yellow-button board | Kill the obstructing goblin while preserving the one holding the yellow button |
The main route starts inside the matched three-part stage. For broader world orientation, use the world and region index; the opening walkthrough is a different bounded route.
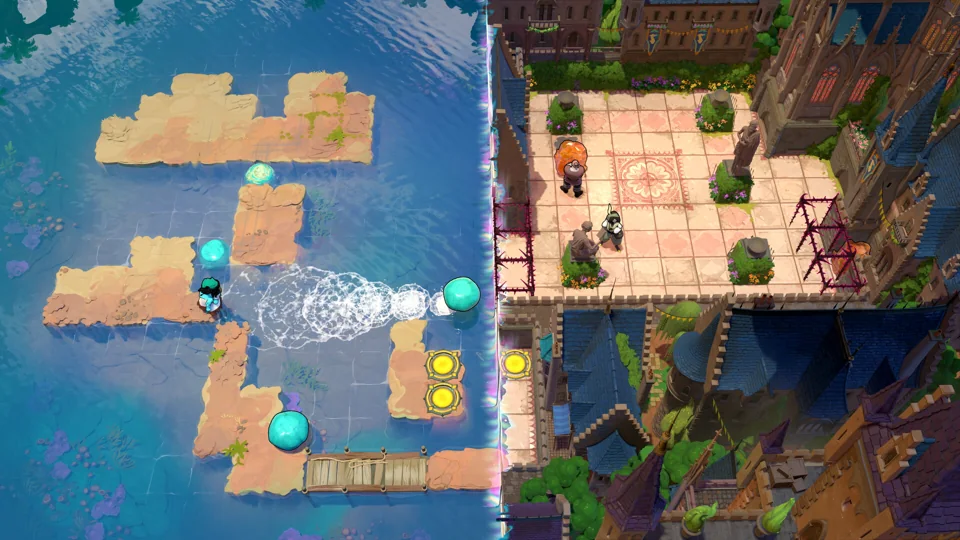
Sources: Hardcore Gamer — Adam Beck, Heroes and Mirrors Part 5 · r/OrderOfTheSinkingStar — Am I right that this monster must survive?
Treat fire as a puzzle rule
Move and reflect the dragon rather than looking for an attack command. PlayStation's official hands-on report describes a game without fighting: goblins threaten adjacent characters, while fire-breathing creatures threaten things along their line of sight.
In the covered stamp stage, the Warrior pushes dragons and mirrors. Reflection can put a dragon on another square and change the direction it faces. Compare the reflected position before activating the mirror; each room depends on where the breath will go after that transfer.
Directions below use the original overhead view: up is toward the top of the screen. Begin from the matching room's initial arrangement. The first room's displacement counts belong to that arrangement; they are not a universal code for every dragon puzzle.
Sources: PlayStation Blog — official PS5 hands-on report · Hardcore Gamer — Adam Beck, Heroes and Mirrors Part 5
Part 1 — send a south-facing dragon into the pond
This first board has a tiled waterfront, a movable mirror and a goblin stranded on the little island below. Its solution uses the dragon's final shot as it falls into water. Start by keeping the Warrior out of the dragon's current fire line.
Reflect the Warrior across the gap
Use the room's mirror to cross the gap without walking into the dragon's breath. You need to reach the side where you can push the dragon and reposition the mirror.
Set up the dragon's southern reflection
Move the mirror above the dragon. Maneuver the dragon to a position four squares left and two squares down from its initial square, as described for this arrangement. Route it around the intervening geometry rather than trying to perform all four leftward pushes first. Use the mirror reflection to make the dragon face down toward the water.
Shift the mirror to the right wall
Push the mirror right until the wall stops it. Check that the dragon's reflected position is in the pond and that its downward fire line points at the goblin's island.
Reflect the dragon into the water
Activate the mirror to transfer the dragon to that position.
Completion signal: The falling dragon fires at the island goblin. The two threats blocking this segment are removed, allowing the stage to continue to its next board.
Sources: Hardcore Gamer — Adam Beck, Heroes and Mirrors Part 5
Part 2 — leave room beside the mirror
The next board has two mirrors at the right, a dragon in the central open space and a goblin on the ledge across the water to the left. The critical position is beside the mirror, where you can get behind the dragon for its final leftward push. Sending it against the wall too early removes that access.
Reach the upper side
Stand below the dragon and use the right-hand mirror to reflect the Warrior into the upper part of the board.
Open access behind the dragon
Push the dragon down two squares. Walk into the space this creates behind it so you can push it right and then up toward the mirror arrangement.
Reflect it beside the mirror
Use the mirrors to place the dragon in the upper-right area where the Warrior arrived. Stop with the dragon next to the mirror, leaving it accessible; do not place it tight against the wall.
Bring it through the mirror passage
Push the dragon down through the gap between the two mirrors. Get to its right side and push it left across the open board, keeping its head facing the goblin across the water.
Make the final push into water
Push the left-facing dragon off the board's left edge.
Completion signal: Its fire reaches the goblin on the opposite ledge as it falls. Continue to the last board after these blocking creatures have been removed.
Sources: Hardcore Gamer — Adam Beck, Heroes and Mirrors Part 5
Part 3 — reflect the breath back toward the left
Identify the caged dragon at the upper left, facing right across the top lane. A goblin stands below that lane, and the pink barrier protects a blue exit at the left. The mirrors let the breath travel right from the dragon, then return left along the row beneath it.
The first target is the goblin. Removing it and removing the dragon are two different steps; the dragon must remain alive long enough to fire again.
Put one mirror below the goblin
Move the initially upper-right mirror directly beneath the goblin. You will use this mirror to push the goblin upward into the returning fire line.
Make the paired reflection
Keep the mirror beneath the goblin available for the next step. Arrange the right-hand mirror pair on one column in adjacent rows, with their reflective faces opposing each other. Push the pair up into place: the upper reflection follows the dragon's row, and the lower reflection runs along the row immediately below it.
Push the goblin into the lower fire line
Get beneath the mirror under the goblin and push it up. It pushes the goblin into the leftward returning breath.
Completion signal: The goblin is killed by the reflected flame. The dragon remains behind the bars at this point.
Return the fire to the dragon
Move that same mirror left, then up one square. This redirects the reflection onto the dragon's own position.
Completion signal: The dragon is hit by its own fire. The pink barrier at the left becomes passable.
Reach the blue exit
Walk through the cleared left-hand barrier to the blue exit marker.
Completion signal: You have cleared the creatures and reached the endpoint of the covered three-part stamp stage. The original guide identifies this stage as contributing to stamps; this page does not assign an unsupported trophy, stamp count or later story reward.
Sources: Hardcore Gamer — Adam Beck, Heroes and Mirrors Part 5
Check the arrangement when the sequence stops working
Recovery follows the specific covered board; it does not diagnose every dragon puzzle.
Scroll across to read every column.
| What went wrong | What to check |
|---|---|
| The first reflected dragon misses the island | Restore the south-facing dragon and the mirror against the right wall before transferring it |
| The second dragon is trapped against a wall | Undo to its reflected placement; it belongs beside the mirror so you can push it down between the two mirrors |
| The final stamp-stage goblin survives | Check the lower, leftward returning fire row; push the goblin into that row before moving its mirror to target the dragon |
| The historical yellow gate closes | The lower-left button goblin was killed or displaced; restore it and reblock the dragon on the move immediately after the first kill |
| The room has different heroes, gates or mirrors | Return to the identification table and match another arrangement; these moves are not a universal dragon solution |
The supplied Torc recording by Postmode covers beam rotation and the SxB gold-room route. It is not a demonstration of these dragon boards. Likewise, a Heroes and Water recording should not be substituted for a Heroes and Mirrors solution merely because both show monsters.
Sources: Hardcore Gamer — Adam Beck, Heroes and Mirrors Part 5 · r/OrderOfTheSinkingStar — Am I right that this monster must survive? · Postmode — Torc walkthrough
Sources and scope
- Hardcore Gamer — Adam Beck, Heroes and Mirrors Part 5
Original guide published October 8, 2026. Complete three-part text and nine original author pictures read; source-local Part 5 stamp grouping. Exact capture platform and patch unspecified; no hands-on game testing claimed.
Research checked
- PlayStation Blog — official PS5 hands-on report
July 21, 2026 official preview description of non-combat puzzle threats. It supports the premise, not this exact stamp-stage sequence.
Research checked
- Postmode — Torc walkthrough
Original October 11, 2026 creator metadata identifies Torc and the SxB gold-room route. Retained only to distinguish that recording; it is not evidence for a dragon-room solution or claimed current playback.
Research checked